detail.tmall.com
TechEmbedded
✨
使用 Arduino + WS2812B 创建随环境变化的可遥控灯带
Posted at Oct 31, 2025 · Edited at Mar 29
Some components made this article cannot be loaded successfully. Now they’re deleted and they’ll come back as soon as I solve the problem.
我回忆到去年生日的时候家人送的我的礼物,里面有一些串联的暖色的闪烁的发光二极管,那天晚上我把它放在了我的收藏品展示柜里,发现特别合适,而且很好看。结果不小心地,它的纽扣电池被弹飞了,然后就伤心地结束了这个想法。
最近我购置了一些新的物品,并且发现家里的 Arduino 也吃灰了许久,所以我就再一次地萌生了这个制作一个灯带的照明计划。
靠着周末的时间,我从找灯带,确定了一个比较流行的 WS2812B LED Strip,然后简单地规划了一些功能,还买了一些额外的装饰品。最后花了超出预期的时间测试代码,尤其是红外线接收错误信号的问题,在一边实践的时候一边编写好了这个文章。另外,我还花了时间准备好了接线图:Connections
同时,你还可以在这里了解如何配置 VS Code 的 Arduino 开发以及在 Windows 上的 Arduino 驱动问题。
准备
物品
部分所列商品均为本人在淘宝或其它平台选购所得,并非商业推广,所选型号仅作参考性建议提供。所提供链接均已删除额外 URL 参数。
你还可以选择更适合你的 LED 灯带类型或其他物品的类型,不同类型的物品可能会影响你的购物清单。(例如其他灯带的工作电压可能会不同)
必要的
- Arduino Uno ×1
- 不同类型的杜邦线 ×若干
- 螺丝刀 x1 用于打开电源适配器端子
- 电烙铁 x1 用于连接电源输出的导线和灯带连接器的铜芯
- ≈ 22 AWG 适当长度导线 ×2 用于接入电源适配器输出,你应该准备两种不同颜色便于区分正负极
- 三线插头的电线 ×1 AC220V 用于连接市电和电源适配器,另一头需剪断 输入电压规格可能会根据你所处的国家不同,请以实际为准 你还可以直接购买即插即用的电源适配器来避免该装置存在的安全隐患,但需注意其输出规格
- 电源适配器 ×1 需购买的输入电压规格可能会根据你所处的国家不同,请以实际为准 该装置存在一定安全隐患,你还可以直接购买即插即用的电源适配器,但需注意其输出规格 AC220V → DC5V 20A 100W
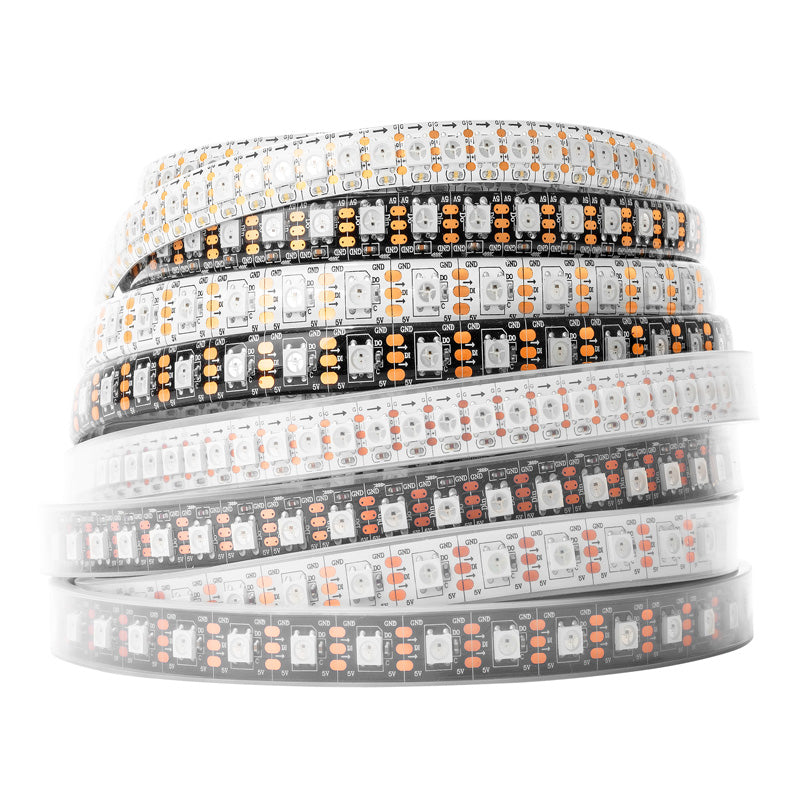
- WS2812B ×1 白板滴胶, 60灯珠/m, 5m
- 灯带连接器 x1 这应该是购买灯带后随附的连接器。提供一个连接到灯带的接头,以及 5V+GND 可焊接导线,5V+DIN+GND 母头 (共5个接口)
WS2812B RGB IC 5050SMD Pure Gold Led Pixel Strip Flexible Full Color 3
Shipping PolicyNotice: Customers should take care of the clearance and customs duties. Features: Input Voltage:DC 5v. Power: 30leds/m----9watt/meter. 60leds/m----18watt/meter. 74leds/m----22watt/meter. 96leds/m----28.8watt/meter. 100leds/m----30watt/meter. 144leds/m----43.2watt/meter. Grey Scale: 256. Bits/color: 8-b
item.taobao.com
传感器(可选)
- 电位器 用于滑动调整亮度大小
- 按钮 ×2 对应程序里的照明控制按钮,色彩控制按钮
- 红外线传感器/遥控器 HX1838遥控模块+遥控器套件
detail.tmall.com
- 环境光传感器 亮度传感器升级版
item.taobao.com
装饰物(可选)
收藏品 ×若干你喜欢的物品。
这些是为了装饰我的收藏品所购买的。
- 苔藓(纺织) ≥30g 推荐更大 丝状苔藓浅绿
detail.tmall.com
- 假竹 ×10
13cm
item.taobao.com
- 石片 ×10 ”青云石片”, 2-5cm
item.taobao.com
其他(可选)
- LED 连接器 ×若干 如果你要剪断灯带,则需要根据实际情况购买这些连接器来连接它们 不会在文章和接线图中说明
Connector & Cable
Full Series Digital LED Strip Light. WS2811 WS2812B WS2813 WS2815 SK6812 RGB RGBW, BTF-LIGHTING is a top quality LED lights wholesaler. Deliver high performance hence low power consumption led strips. We support custom order as well.
item.taobao.com
- 电工胶布 x1 用于在不切断的情况下固定灯带 PVC电气胶带(白色)
detail.tmall.com
- 面包板(推荐) ×1 方便给各用电器供电,下文将使用到它
- 电阻 ×若干 用于保护电路,根据实际情况购买 不会在文章和接线图中说明
- 电容 ×若干 用于保护电路,根据实际情况购买 不会在文章和接线图中说明
功能
这些内容只是在概念上的功能。因为时间紧张,之后我会将全部功能细节和可复用代码同步更新。
我使用 
 和
和 FastLED LED animation library for Arduino (formerly FastSPI_LED)
![FastLED LED animation library for Arduino (formerly FastSPI_LED)]()
Arduino-IRremote
Github
Arduino-IRremote
Owner
Arduino-IRremoteUpdated
May 2, 2026FastLED LED animation library for Arduino (formerly FastSPI_LED)
FastLED supports popular LEDs including Neopixel, WS2801, WS2811, WS2812B, LPD8806, TM1809, and more. The library runs on a wide range of Arduino and compatible boards, including both AVR- and ARM- based microcontrollers.
多 Cabinet
也就是有多个展示柜,我没有剪断灯带,而是将它缠绕布满我的展示柜。每个展示柜有不同的收藏品,以及不同的主题色,我可以给它们规定不同的颜色。以及,我可以忽略在两个展示柜之间缠绕的桥段,也就是关闭额外的灯珠。
电位器
可以通过电位器上的旋钮控制亮度,并且有防抖和死区排除(实际范围是 40~1020)的功能。
Eco 模式
延长灯带的寿命。除了电位器操作,在不同的光照环境下没有操作后降低亮度,直到新的按钮或红外线控制。
照明模式
通过按下照明控制按钮循环控制。
- 关闭 照明处于长期关闭状态。
- 正常 开启照明。
色彩模式
通过按下色彩控制按钮循环控制。
- 全局纯色模式 所有灯泡除被忽略的灯泡都以 #FFA028 颜色。
- 独立纯色模式 每个 Cabinet 的灯泡都以其不同的颜色照明。
- RGB模式 所有灯泡除被忽略的灯泡都进行 RGB 循环。
过渡效果
在亮度切换期间,会有 1.25s 的过渡效果,特别是使用红外线控制时。
红外遥控
在较远距离控制灯带行为,以及微调亮度。
我的遥控器每个按键被接收到的数据和对应的功能
按钮 | 操作 | 接收数据 |
1 | 将亮度设置为 10% | BA45FF00 |
2 | 将亮度设置为 20% | B946FF00 |
3 | 将亮度设置为 30% | B847FF00 |
4 | 将亮度设置为 40% | BB44FF00 |
5 | 将亮度设置为 50% | BF40FF00 |
6 | 将亮度设置为 60% | BC43FF00 |
7 | 将亮度设置为 70% | F807FF00 |
8 | 将亮度设置为 80% | EA15FF00 |
9 | 将亮度设置为 90% | F609FF00 |
0 | 将亮度设置为 0% | E619FF00 |
* | 照明控制按钮 | E916FF00 |
# | 色彩控制按钮 | F20DFF00 |
OK | 打开/关闭电位器控制 | E31CFF00 |
↑ | 将亮度增加 5% | E718FF00 |
↓ | 将亮度减少 5% | AD52FF00 |
← | 将亮度减少 1% | F708FF00 |
→ | 将亮度增加 1% | A55AFF00 |
实践
开发环境
驱动
仅适用于 Windows 用户,如果你是 macOS 或 Linux 用户,请跳过该小节。
在我的情况里(Windows 11, Arduino Uno),当我从 Arduino IDE 安装文件夹里的 drivers 文件夹安装的驱动时(2024年以后),我总是会在上传时遇到
Avrdude: ser_open(): can't set com-state for "\\.\COMN 的错误。在网络上探寻一番后,最终我安装了 2014 年的旧版驱动,解决了该问题。你可以在结尾的 “参考” 处找到我搜寻到的解决方案的链接。
你可以在 SparkFun 上的文章 下载由他们提供的旧版驱动,或者直接从这里下载:
These operating systems have the CDC drivers pre-installed, which means you shouldn't need to install any extra software. However, there are a wide range of operating systems out there, so if you run into driver problems, you can get the archived drivers linked below
下载并解压压缩包后,打开 SETUP.EXE,选择 “Uninstall” (卸载),然后选择 “Install” (安装)
Arduino CLI
实际上,下文所用到的工具(Arduino Community Edition 扩展)自带 Arduino CLI ,如果你想要自定义版本,可尝试这一步骤。否则推荐跳过这一小节。
如果你不想使用 Arduino IDE(下文也不会使用),则需要安装 Arduino CLI 以便给我们的开发板进行编译和烧录工作,你需要前往 https://docs.arduino.cc/arduino-cli/installation/#download 下载适合你的 Arduino CLI 版本。
为了方便在终端调用 Arduino CLI ,我们还需要将其添加到我们的环境变量中。
我下载的是 Windows MSI 安装程序,如果你使用用户权限的终端尝试运行
arduino-cli ,你会发现终端会提示它不存在。展开这里以查看在 Windows 上解决 Arduino CLI 的环境变量问题
按下 Windows 键,键入 “path” ,
然后打开 “Edit the system environment variables”(编辑系统环境变量)。
在弹出的窗口中,选择 “Environment Variables” (环境变量)。

如果你下载的是 Windows MSI 安装程序并安装好了 Arduino CLI,请在系统环境变量中找到
Path ,点击选中,然后选择 “Edit” (编辑),你应该会发现最下方有一个包含 “Arduino CLI” 的变量,例如我的是 C:\Program Files\Arduino CLI\ ,如果你是下载的 exe 版本的 Arduino CLI,请复制它的绝对路径(不包含文件本身)。然后,复制这个变量。接着,在用户环境变量中找到
Path ,点击选中,然后选择 “Edit” (编辑),然后选择 “New” (新建),粘贴刚刚复制的变量或路径,然后选择 “OK” (完成),最后再次选择 “OK” (完成)这时如果你已经打开了 Visual Studio Code 或者终端,请先重启它们。
安装好 Arduino CLI 后,打开 Visual Studio Code,新建一个终端,然后依次输入以下命令
Visual Studio Code
由于我不是特别喜欢使用 Arduino IDE,以及我想得到更多编码上的支持,例如 C++ IntelliSense 的功能,所以我选择了 Visual Studio Code 作为编辑器,你可以点击它来查看详情并下载。
接着我们需要安装一个为在 Visual Studio Code 上便捷开发 Arduino 的插件。这里我选择了 Arduino Community Edition 插件。

安装后,打开 Visual Studio Code 的设置界面,并对该扩展进行配置。

如果你希望使用扩展自带的 Arduino CLI ,只需要勾选 “Arduino: Use Arduino Cli” 即可。
如果你希望自定义 Arduino CLI 版本,找到 “Arduino: Path”,粘贴你的 Arduino CLI 的安装路径,默认为
C:\Program Files\Arduino CLI\如果你不确定Arduino CLI 的安装路径,请在 Arduino CLI 环节的“展开这里以查看在 Windows 上解决 Arduino CLI 的环境变量问题”中找到获取 Arduino CLI 安装路径的方法。
或者,图中的文字也给予了你提示。
接着重新启动 Visual Studio Code。
然后,打开你的项目文件夹,如果还没有,创建一个和父级目录同名的
.ino 文件,点击展开,然后粘贴这个项目的代码。
在验证或上传之前,还需要对插件进行进一步配置。连接 Arduino Uno 到你的电脑,依次在下方找到
<Select Board> 和 <Select Serial Port> 并选择 Arduino Uno (Arduino AVR Boards) 和开发板目前处于的串口,例如我的是 COM5 。
现在在当前文件夹下的
.vscode 文件夹内,扩展应该会生成一个arduino.json文件,你需要在该文件内指定代码的编译文件夹,名称随意,我这里使用了 dist作为输出(编译)文件夹的名称。所以在该文件内添加一个选项,为
"output": "./dist” ,最后我的 arduino.json 如下:我们还需要安装用于控制灯带(WS2812B)的库以及红外遥控功能。
由上文所述,这里我选择了FastLED LED animation library for Arduino (formerly FastSPI_LED)![FastLED LED animation library for Arduino (formerly FastSPI_LED)]()
FastLED LED animation library for Arduino (formerly FastSPI_LED)
FastLED supports popular LEDs including Neopixel, WS2801, WS2811, WS2812B, LPD8806, TM1809, and more. The library runs on a wide range of Arduino and compatible boards, including both AVR- and ARM- based microcontrollers.
Arduino: Library Manager 
然后在搜索框中搜索 “FastLED” 安装搜索结果中全字匹配的库,也就是
FastLED ,点击 Install 安装。和刚刚的做法一样,在搜索框中搜索并安装 “IRRemote” (≥4.5.0) ,点击 Install 安装。
如果以后你需要使用其他的库,你也可以像这样安装。如果你之前使用过 Arduino IDE,你会发现它类似于其的库管理界面。
回到项目代码,点击右上角的 ✅ 图标的按钮验证代码。

如果你的 Visual Studio Code 的 C/C++ 扩展配置正确,它会在
.vscode 下生成一个 c_cpp_properties.json 文件,这样你就可以在 Visual Studio Code 里编写由 IntelliSense 提供支持的 Arduino 源文件了。接线
我在 Fig Jam 上创建了一个接线图,用于给你提供参考。Connections
请确认你在物品章节中准备好了所需物品。
电源
三思而后行。
在涉及到高压电的操作时,请务必注意安全。
请确保在安全环境下操作,如干燥的环境,确认线材没有破损,在接线完成前断开电源等。
文章提供的做法仅供参考,且有可能存在安全隐患,或许你应该根据实际情况做出变更。
我强烈建议在专业电工指导下完成,他们会提供更详尽的步骤和充分的经验。
如果你是未成年人,你应该在家长的陪同下完成。
继续操作则代表你知晓可能带来的风险。
- 准备线材 使用剥线钳,将三线插头电线的另一端的绝缘层剥开,并使其露出适当长度的铜芯。 你应该区分出其中的三根导线,分别为
火线 (Live) · 一般为棕色或红色。
零线 (Neutral) · 一般为蓝色。
地线 (Earth) · 一般为黄绿相间的条纹。
使用剥线钳,将两根 ≈22AWG 的导线的绝缘层剥开。
- 连接导线 使用螺丝刀,分别解下电源 L, N, ⏚, V+, V- 对应的端子,如果有两个 V+ V- 对应的端子,解下一个即可。
将 火线 (Live) 的铜芯卷曲呈大致的圆形,并放置在电源 L 端子上,然后用螺丝刀锁紧。
将 零线 (Neutral) 的铜芯卷曲呈大致的圆形,并放置在电源 N 端子上,然后用螺丝刀锁紧。
将 地线 (Earth) 的铜芯卷曲呈大致的圆形,并放置在电源 ⏚ 端子上,然后用螺丝刀锁紧。
将一根 ≈22AWG 的铜芯卷曲呈大致的圆形,并放置在电源 V+ 端子上,然后用螺丝刀锁紧。
将一根 ≈22AWG 的铜芯卷曲呈大致的圆形,并放置在电源 V- 端子上,然后用螺丝刀锁紧。
再次确认所有确认没有松动和外露。
使用电烙铁,将连接到电源 V+ 端子的导线焊接到灯带连接器红色(正极)的铜芯上。
使用电烙铁,将连接到电源 V- 端子的导线焊接到灯带连接器白色(负极)的铜芯上。
- 连接 Arduino 这里使用的是 Arduino Uno。
将灯带连接器的红色杜邦线母头通过公对公杜邦线连接到面包板的正极轨道上。
将灯带连接器的白色杜邦线母头通过公对公杜邦线连接到面包板的负极轨道上。
一般情况下,面包板的电源轨(Power Rails)是纵向连接的。
- 连接各用电器
一般情况下,面包板的接线区(Terminal Strips)是横向连接的。
将各用电器纵向插入面包板的接线区,确保各用电器引脚都在不同的行上。
将若干的公对公杜邦线,从个用电器对应的 VCC/+(正极) 引脚/行 插入到面包板的正极轨道上。
将若干的公对公杜邦线,从个用电器对应的 GND/-(负极) 引脚/行 插入到面包板的负极轨道上。
对于一般的电位器,哪一端接GND/-,哪一端就是电压的“零点”,也就是 0(→1023)
或者你也可以直接从 Arduino 连接用电器的不同引脚,而不是插到面包板上
数据
根据上方准备章节,下面的用电器的数字/模拟信号引脚将插入对应 Arduino 的引脚。你可以自行更改,然后在代码里应用。
将若干的杜邦线,从 Arduino 上的引脚插入到个用电器对应的数字/模拟信号引脚位置,如果是面包板上,确保它处于同一行。你可以用不同类型的杜邦线扩展到适合的长度。
- D1 照明控制按钮
- D2 色彩控制按钮
- D6` 灯带 插入到灯带连接器的绿色杜邦线母头上
- D5` 红外线传感器
- A0 环境光传感器
- A1 电位器 在正中央的引脚
结语
这次的小项目花了我很多的时间,但是仍有一些收尾工作还没有完成。我将这里聊聊在做这个项目时一些很奇特的感受和体验。
第一次接触到高压电、创意和兴趣还是专心校内的学习以及简单概述为什么我会在第一次成功后看着成果发呆。
See you soon!
参考
VS code配置Arduino开发环境_vscode arduino-CSDN博客
文章浏览阅读4.2k次,点赞11次,收藏35次。使用VS Code+Arduino-CLI来进行Arduino开发_vscode arduino
 GitHub[Warning] Failed to generate IntelliSense configuration. · Issue #1235 · microsoft/vscode-arduino
[Warning] Failed to generate IntelliSense configuration. · Issue #1235 · microsoft/vscode-arduino
What do I need to do to correct this on MacOS 10.4.6 with : Version: 1.56.0-insider Commit: ce791d27dc9889a392f4d29abefe9c53eb0b5129 Date: 2021-04-16T11:23:31.851Z Electron: 11.4.2 Chrome: 87.0.428...
GitHub Arduino ForumAvrdude: ser_open(): can't set com-state for "\\.\COM7"
Avrdude: ser_open(): can't set com-state for "\\.\COM7"
Better news, it does work in the hardwired application. Despite the differences it behaves the same. 😀
Arduino ForumHow to Install CH340 Drivers - SparkFun Learn
In this tutorial, we'll show you how to install CH340 drivers on multiple operating systems if you need. The driver should automatically install on most operating systems. However, there is a wide range of operating systems out there. You may need to install drivers the first time you connect the chip to your computer's USB port or when there are operating system updates.
 剥线钳 - 维基百科,自由的百科全书
剥线钳 - 维基百科,自由的百科全书
美式简易手动剥线钳是一对相对应的刀片,像是剪刀或斜口钳。增加了中心的凹口以便于切割绝缘层而不切到电线芯。此种剥线钳使用时要施加压力并绕绕绝缘层旋来切割层周的绝缘层割因为于绝缘层没有粘结到电芯上,因此很容易将其从末端拉出。这种类型的剥线适用于于任何尺寸的电线。